8 Things to Check Before Calling for HVAC Repairs
A sudden air conditioning or heating failure can turn a comfortable home into an unlivable environment in a matter of hours. Before you pick up the phone to schedule an emergency service visit, it is wise to perform a few basic troubleshooting steps on your system. Taking a few minutes to inspect your unit can save you from paying a diagnostic fee for a simple issue that you could easily resolve on your own.
1. Check the Status of Your Thermostat
Many service calls stem from simple thermostat issues rather than a major mechanical failure inside the heating or cooling equipment. Verify that your thermostat screen is lit and showing text, as dead batteries are a frequent cause of unresponsive systems. Next, confirm that the control is set to the correct mode, such as "Cool" during summer or "Heat" during winter, and check that the temperature setting is lower or higher than the current room temperature. If the screen remains blank after you replace the batteries, it might be time to contact a trusted HVAC company to inspect the wiring or replace the control board.
2. Inspect the Condition of Your Air Filter
A heavily clogged air filter restricts airflow through your ductwork, causing your system to work harder, short-cycle, or freeze up entirely. When air cannot flow freely across the evaporator coil, the unit cannot regulate the temperature in your home and may shut down entirely to prevent overheating. Slide the filter out of its housing and hold it up to a light source to check for a thick layer of dust, pet dander, or debris. According to HomeGuide, a properly installed HVAC system can last 15 to 25 years when it is well maintained. Replacing a dirty filter every 30 to 90 days is one of the easiest ways to protect that lifespan and keep your monthly utility bills low.
3. Verify the Position of Your Circuit Breakers
HVAC systems draw a significant amount of electricity, which can occasionally cause the electrical breakers to trip during periods of extreme outdoor temperatures. Head to your home's main electrical panel and look for the breakers labeled for your indoor air handler and your outdoor condenser unit. A tripped breaker will not always sit completely in the "Off" position; it often floats loosely in the middle, requiring you to flip it firmly to "Off" before resetting it back to "On." If the breaker trips again immediately after you reset it, do not attempt to force it, and call an HVAC company right away to diagnose the underlying electrical short.
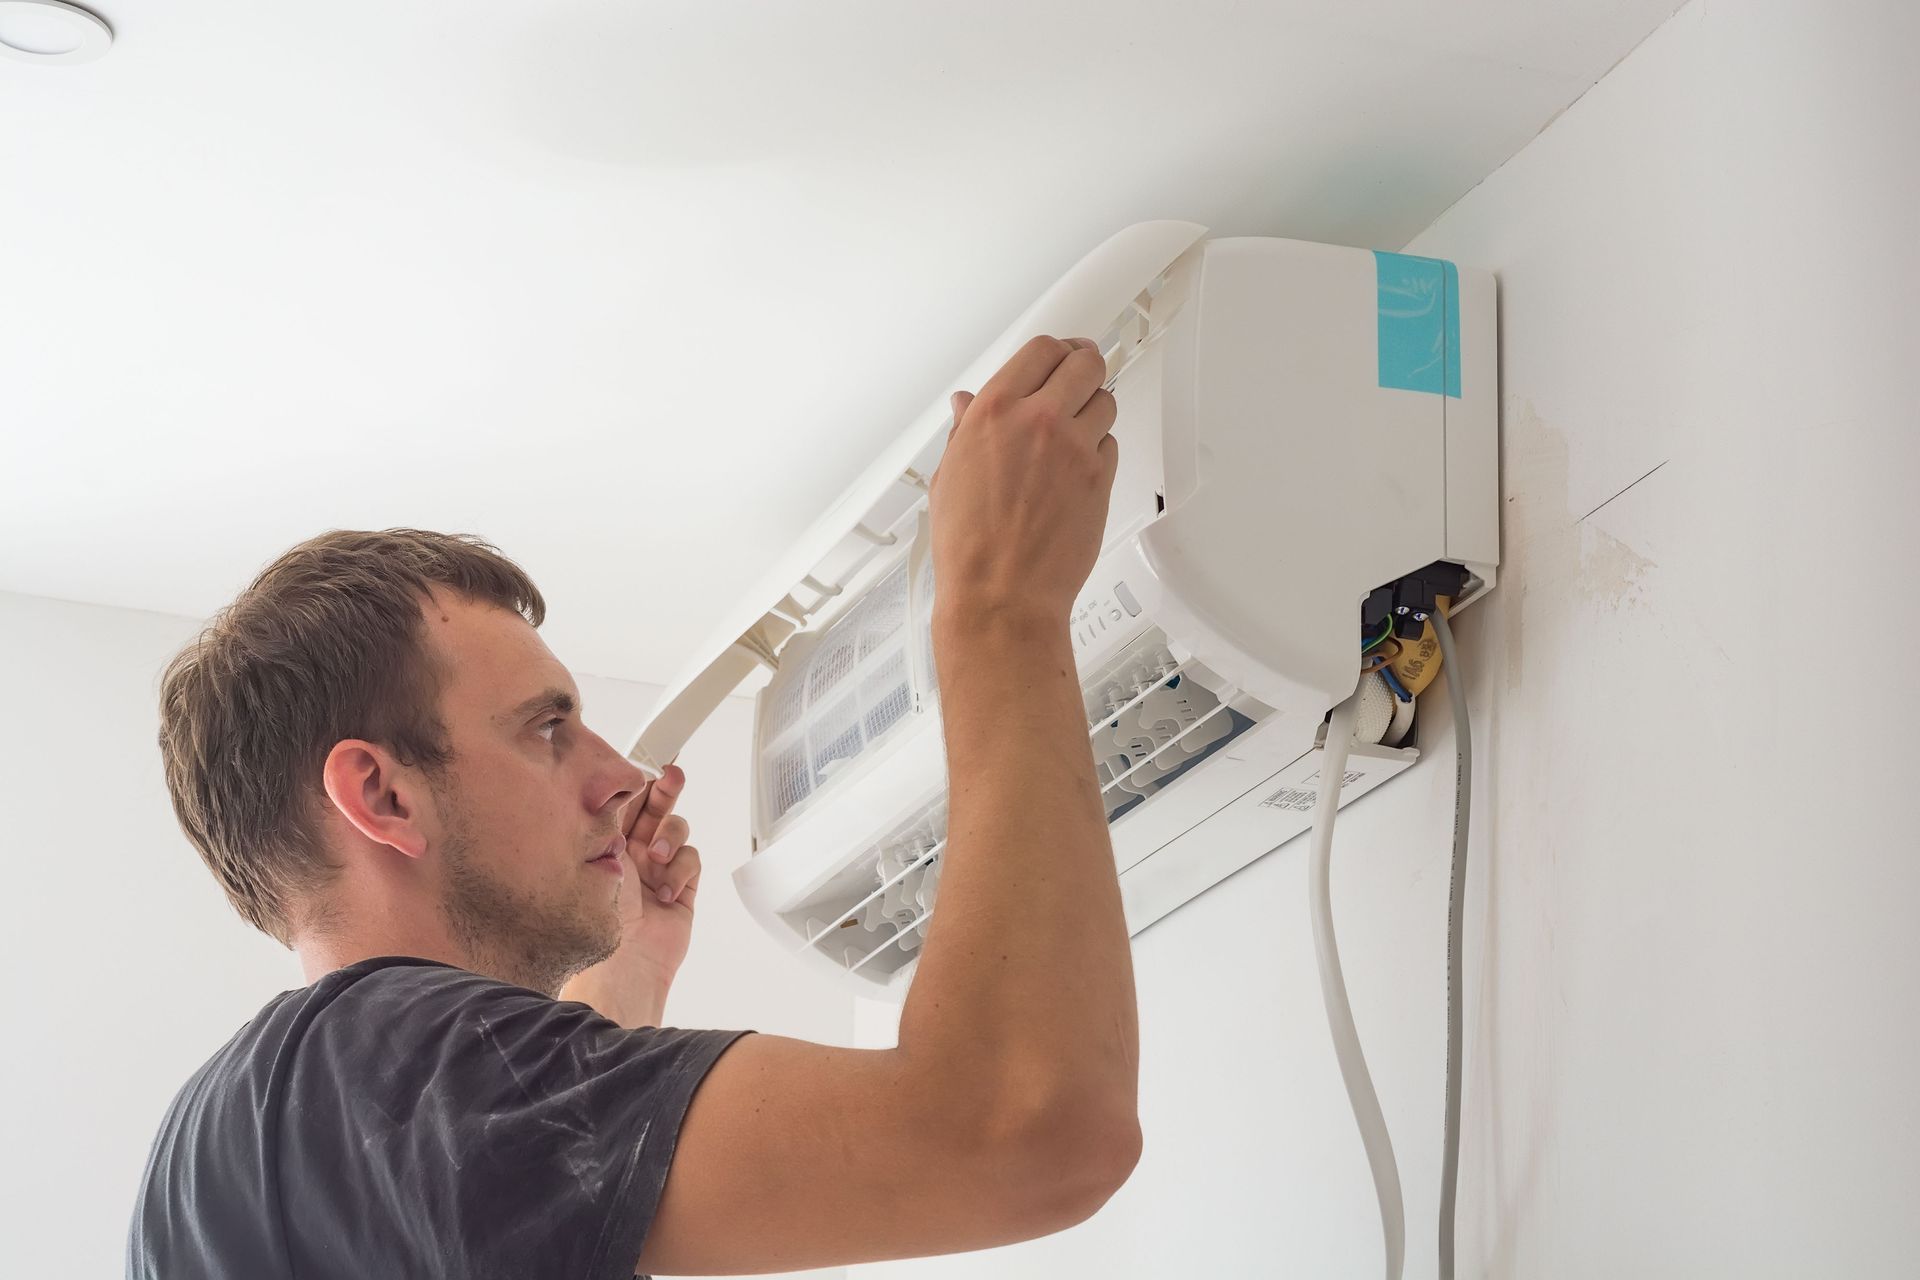
4. Examine the Main Power Switches
Both indoor air handlers and outdoor condenser units feature dedicated safety switches designed to cut off electrical power instantly during maintenance or emergencies. The indoor switch resembles a standard household light switch and is typically located on the side of the furnace or on a nearby wall in your utility closet or basement. Outdoors, you will find a metal disconnect box mounted to the side of your home near the condenser unit, which contains either a toggle switch or a pull-out fuse block. Make sure no one accidentally flipped the indoor switch off while reaching for a light, and confirm that the outdoor disconnect pullout is pushed firmly into its slot.
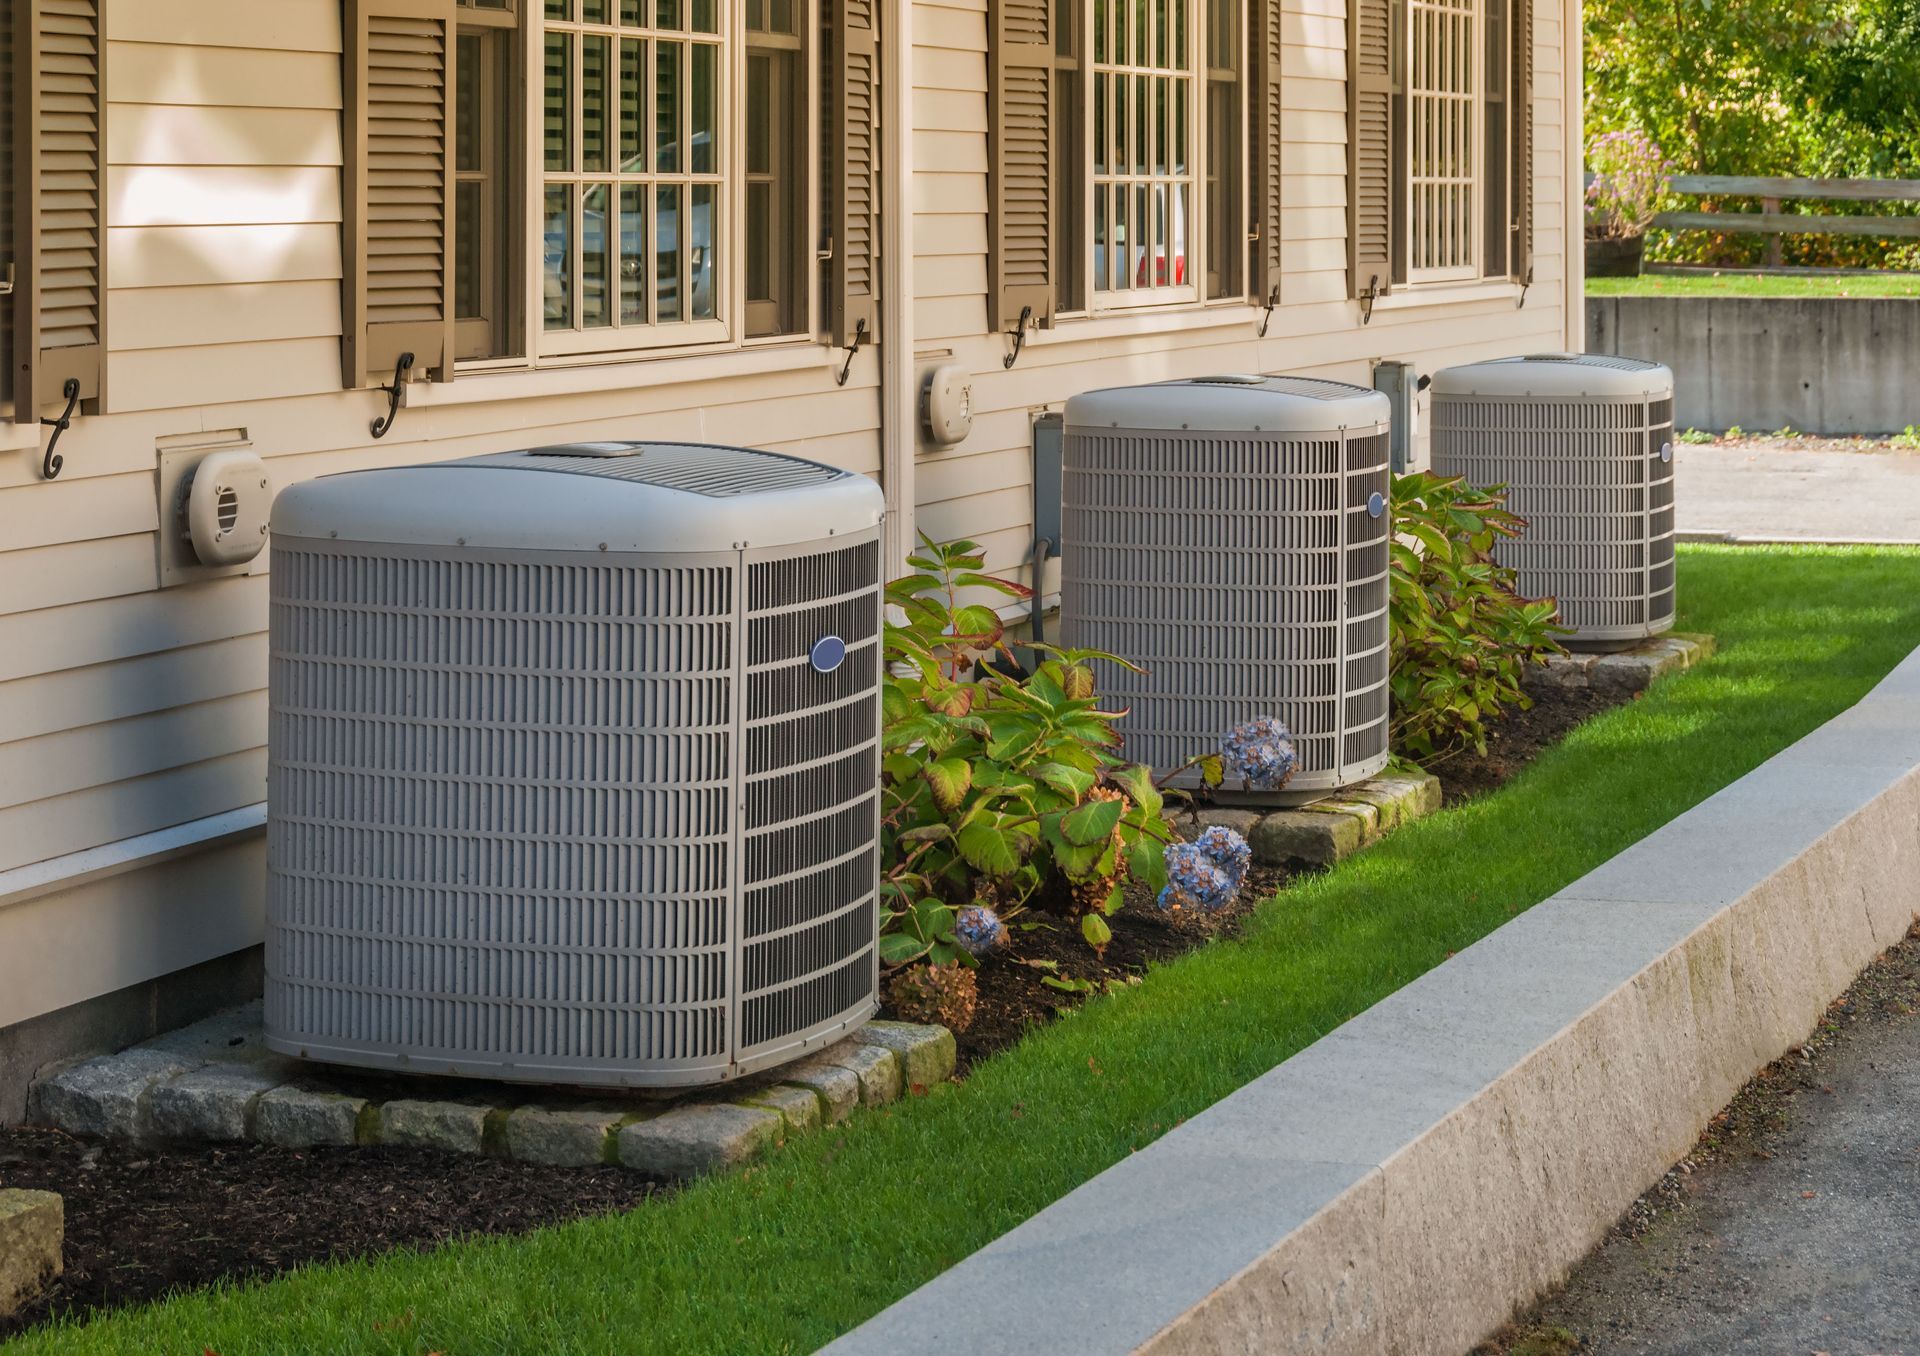
5. Clear Obstructions From the Outdoor Unit
Your outdoor condenser unit requires a steady, unobstructed flow of ambient air to release the heat it absorbs from inside your living spaces. Over time, blowing leaves, tall grass, weeds, and low-hanging tree branches can surround the metal cage, choking off the airflow and causing the compressor to overheat. Walk outside and clear away all debris, maintaining a minimum of two feet of open clearance entirely around the perimeter of the unit. If the metal fins are caked in mud or grass clippings from mowing the lawn, you can gently rinse them down with a garden hose, but avoid using a pressure washer, which can bend the delicate aluminum fins and force you to hire an HVAC company to comb them out.
6. Observe the Indoor Condensate Drain Line
As air conditioners pull humidity out of your indoor air, the moisture condenses into water droplets and flows into a drain pan before exiting through a PVC drain line. If algae, mold, or dust blocks this narrow pipe, the water will back up into the drain pan, triggering a safety float switch that shuts down the entire system to prevent water damage to your ceilings or floors. Inspect the clear or white PVC pipe near your indoor unit to see if water is backed up, or check if the safety pan underneath the equipment is filled with standing water. You can occasionally clear minor clogs using a wet-dry vacuum on the outdoor end of the pipe, but a persistent backup requires the specialized tools of a professional HVAC company to clear the line completely.
7. Survey the Supply and Return Vents
Closing too many interior doors or blocking your vents can disrupt the delicate pressure balance required for your heating and cooling system to operate efficiently. Walk through every room in your home to make sure that large furniture pieces, rugs, or heavy drapes are not resting directly over your supply registers or return air grilles. Keep at least 80 percent of your interior supply vents completely open, even in unoccupied rooms, to prevent static pressure from building up inside your ductwork.
Furthermore, blocked vents force your system to run longer cycles to meet the temperature demand, which dramatically accelerates component wear and tear. When supply air is trapped inside the ducts, it leaks out of minor seams and joints into unconditioned spaces like your attic or crawlspace, wasting money and driving up your monthly utility costs. If you notice certain rooms are consistently too hot or cold, it is tempting to completely close the registers in those spaces, but doing so only worsens the systemic strain. Instead, leave them open and consult a professional technician to evaluate your ductwork layout or recommend a zoning solution that balances airflow properly throughout your entire home.
8. Look for Hidden Red Disconnect Buttons
Many modern furnace burners and blower motors feature built-in thermal overload switches designed to shut down the unit if components get too hot. This safety mechanism is usually controlled by a small red button located directly on the motor housing inside the access panel of your indoor unit. If your system hums but refuses to start, turn off the main power breaker, remove the access panel, and press this red reset button firmly until you hear a distinct click. Replace the panel and restore power to see if the system fires up; if it trips again shortly after starting, stop using the unit and call an HVAC service to inspect the motor for internal wear.
Running through these foundational checks allows you to rule out the most common, non-mechanical causes of system disruptions before spending money on a service technician. If your thermostat is operational, your filters are clean, and your breakers are set, yet your home remains uncomfortable, you have narrowed the issue down to an internal component failure. Contacting a licensed HVAC company at this stage ensures that your system receives the professional care necessary to restore your home's comfort safely and efficiently. If you think you need HVAC repairs, contact Thacker Plumbing & Heating today to learn more and get started!

Share On: